Namaskar! I sometimes mention that I am very interested in integrating Deep Learning and art. I consider myself being an artist, too. A part of Francois Chollet’s book on Deep Learning is dedicated to that topic. And his implementation of a Recurrent Neural Network is the prime example of automatic text generation.
The idea is straightforward. Access a text corpus with an adequate size and train a Neural Network to predict for a given string the one single character that makes most sense to follow. For example for the string „hello worl“, the character that would fit perfectly would be „d“. Right? And here you immediately see how our training data would look like. Inputs would be a sequence of strings with a fixed length and the output would be the next character(s). Lets make it clear with an example of input-output pairs:
"hello " -> "w"
"ello w" -> "o"
"llo wo" -> "r"
"lo wor" -> "l"
"o worl" -> "d"
In today’s exercise we will do the same. But not with Nietzsche! To add a little spicy flavor: We will do it in Hindi!
Deep Learning and Art – Towards the main()-method.
In our first step, we will move towards the main()-method. Let us start with almost two handfulls of imports – the beauty of Python! We need those for HTTP-magic, Neural Network training, Data Science and Natural Language Processing. I guess, you already know most of those imports:
import urllib.request
import os
import zipfile
import glob
import numpy as np
import random
from keras import models
from keras import layers
from keras import callbacks
from keras.utils import plot_model
import matplotlib.pyplot as plt
import progressbar
from indic_transliteration import sanscript
Next would be our global constants. In our Deep Learning world, most of them are called „hyper-parameters“. And a huge portion of Deep Learning is hyper-parameter optimization. The same is true for Deep Learning and art. Let us have a look:
# Path where the corpus will end up.
corpus_path = "corpus"

# Hyperparameters.
transliteration = True # Transliterates the corpus.
input_length = 40 # Length of the input sequence.
output_length = 1 # Length of the output sequence.
data_set_size = 100000 # Size of the data-set to train on.
num_epochs = 150 # Number of epochs to train.
batch_size = 512 # Batch size during training.
hidden_size = 350 # Size of the hidden layer.
generation_length = 160 # Size of the strings that are generated.
So, what do those parameters do?
transliterationThis one is my favorite. It toggles transliteration. More on that later!input_lengthThis says that the prediction is applied to 40 characters.output_lengthMeans that exactly one character is predicted. This could also be extended to more than one. If you like.data_set_sizeDenotes the size of the data-set to train on. The data-set is randomly generated from the corpus. How? We will see that later.num_epochsHow long the training will be. One epoch is training exactly once on the whole data-set.batch_sizeHow many samples will be trained simultaneously during each training step.hidden_sizeThis is the hidden size of the LSTM. The layer of the Neural Network that has short-term memory.generation_lengthSays how long the generated strings will be. With an input-length of 40, this means that 120 characters are predicted.
This is quite straightforward, isn’t it? I invite you to toy a little with these hyper-parameters. You will find the full source-code at the end of this article.
Next is the main-function. We have been waiting for her! Our prototype’s heartbeat. Its mind and soul:
def main():
    """ The main-method. """

    # Makes sure that the corpus is on the hard-drive.
    ensure_corpus()

    # Load the data.
    (train_input, train_output) = load_data()
    print("train_input", train_input.shape)
    print("train_output", train_output.shape)

    # Create the model.
    global model
    model = create_model()

    # This callback is invoked at the end of each epoch. In special
    # circumstances a prediction is done.
    generate_callback = callbacks.LambdaCallback(on_epoch_end=on_epoch_end)

    # Trains the model.
    history = model.fit(
        train_input, train_output,
        epochs=num_epochs, batch_size=batch_size,
        callbacks=[generate_callback]
    )

    # Save the model.
    model.save("model.h5")

    # Plot the history.
    plot_history(history)
Firstly, the method ensures that the text corpus is available on the hard-drive. After that, it extracts a data-set for training from that corpus. Then it creates and trains the model. And finally, the model is stored on the hard-drive and the training history is displayed. Note, that his is usually the normal pipeline for any Deep Learning endeavor. Almost all Deep Learning projects have a similar pattern.
Always make sure that the text corpus is downloadable. What my parents never told me, when I was a kid.
I have a dream. Every time a Deep Learning expert downloads some code from some GitHub-repository to his machine, the code should run immediately. This is something that I embraced and enforced in most of my projects. A crucial point in this picture is the data-set. I always try to avoid the question „Where is the data?“ by providing an automatic way to download it. This could be a bottleneck in each project.
Back to our task at hand. Where is the data? Some very nice guy created a GitHub-repository with raw text for classical Hindi. This is exactly what I had in mind!
So how do we ensure that the corpus is on the hard-drive? Like this:
def ensure_corpus():
    """ Makes sure that the corpus is on the hard-drive."""

    # Do nothing if the filder already exists-
    if os.path.exists("corpus") == False:
        # Download the whole git-repository as a zip.
        print("Downloading corpus...")
        corpus_url = "https://github.com/cltk/hindi_text_ltrc/archive/master.zip"
        corpus_zip_path = "master.zip"
        urllib.request.urlretrieve(corpus_url, corpus_zip_path)

        # Unzip the whole git-repository to the corpus-path.
        print("Unzipping corpus...")
        zip_file = zipfile.ZipFile(corpus_zip_path, 'r')
        zip_file.extractall(corpus_path)
        zip_file.close()

        # Remove the zip-file.
        os.remove(corpus_zip_path)
This method checks if the corpus-directory already exists. If it does it would be a clear indication that downloading would not be necessary. So, if the corpus is not on the hard-drive, the GitHub-repo will be downloaded as a zip file. This file is then extracted to the corpus-folder and deleted afterwards. There is the data! Easy as that!
Next step: Extracting a huge data-set of samples from said corpus.
Remember, the size of the data-set for training is a hyper-parameter. This allows us to do experiments with different sizes of the data-set. A quick reminder: A data-set for training is a huge list of input-output-pairs. Each input is a character-sequence and each output a sequence of predicted characters. Please be so kind and have a look at this method:
def load_data():
    """ Loads the data from the corpus. """

    # Get paths to all files.
    glob_path = os.path.join(corpus_path, "**/*.txt")
    paths = glob.glob(glob_path, recursive=True)

    # Load all files to memory.
    print("Loading all files...")
    file_contents = []
    for path in paths:
        file_content = open(path, "r").read()
        if transliteration == True:
            file_content = sanscript.transliterate(file_content, sanscript.DEVANAGARI, sanscript.IAST)
        file_content = clean_text(file_content)
        file_contents.append(file_content)

    # Getting character set.
    print("Getting character set...")
    global full_text
    full_text = " ".join(file_contents)
    global character_set
    character_set = get_character_set(full_text)
    print("Character set:", character_set, len(character_set))

    # Process the data.
    data_input = []
    data_output = []
    current_size = 0
    print("Generating data set...")
    bar = progressbar.ProgressBar(max_value=data_set_size)
    while current_size < data_set_size:
        random_file_content = random.choice(file_contents)

        random_string = random_substring_of_length(random_file_content, input_length + output_length)

        random_string_encoded = encode_string(random_string)

        input_sequence = random_string_encoded[:input_length]
        output_sequence = random_string_encoded[input_length:]

        data_input.append(input_sequence)
        data_output.append(output_sequence)

        current_size += 1
        bar.update(current_size)
    bar.finish()

    # Done.
    train_input = np.array(data_input)
    train_output = np.array(data_output)
    return (train_input, train_output)
The idea is very, very simple. The most important thing is loading all the corpus files. The module glob helps with that a lot. Of course, the texts are preprocessed in order to make Deep Learning easier. Cleanup is the magic word. This is the Data Science part.
After that, the set of characters is determined. It is what its name says: The set of unique characters in the whole text corpus. This is very important for one-hot-encoding each and every character. There each character is encoded with respect to its position in the character-set.
The easiest part is this one: Randomly picking the training data from the corpus. Just select a random file, then find a random sub-string and split it into input- and output-sequence. Easy as that! And since the size of the data-set is a parameter, you can do a lot of tricks with that!
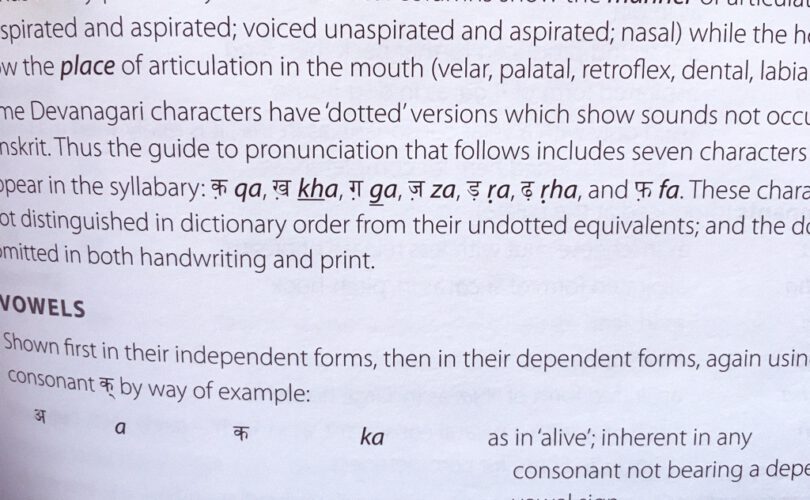
The elephant in the room: Transliteration.
There is one thing that I did not touch. Yet. It is transliteration. As you all might know, Hindi is written in Devanagari, which is a very own set of characters and a set of rules for combining them. It is definitely not the Latin alphabet. The good thing is that transliteration is readily available. Python-style! Look at this:
from indic_transliteration import sanscript
text = "स्थिरसुखमासनम्"
text = sanscript.transliterate(text, sanscript.DEVANAGARI, sanscript.IAST)
print(text)
These four lines of code yield this result:
sthirasukhamāsanam
What does this mean for us Deep Learning enthusiasts? Very simple… Transliteration makes training on Hindu texts easier, since it reduces it to training on the Latin alphabet. Nice, isn’t it?
After the detour… Let us get back to preprocessing the corpus.
A huge portion of Deep Learning is Data Science. Trust me: The data is never in a format that can be fed into a Neural Network easily. It always requires preprocessing. And preprocessing is basically two steps in our example: Cleaning the corpus and encoding it. Cleaning is straightforward:
def clean_text(text):
    """ Cleans a text. """

    text = text.replace("\t", " ")
    text = text.replace("\n", " ")
    text = text.replace("।", " ")
    text = text.replace("0", " ")
    text = text.replace("1", " ")
    text = text.replace("2", " ")
    text = text.replace("3", " ")
    text = text.replace("4", " ")
    text = text.replace("5", " ")
    text = text.replace("6", " ")
    text = text.replace("7", " ")
    text = text.replace("8", " ")
    text = text.replace("9", " ")
    text = " ".join(text.split())
    return text
This removes tabs, new-lines, bars, numbers and surplus whitespaces. If you are thinking „regular expressions“, you are a good guy!
For encoding we need our set of unique characters. This is simple. Grab all the characters from the corpus and make sure to end up with a set. Preferably as a list and sorted. In Python this is very elegant:
def get_character_set(string):
    """ Retrieves the unique set of characters. """

    return sorted(list(set(string)))
This is how the character-set would look like. It has around 50 individual characters:
[' ', '"', "'", '.', ':', '?', 'a', 'b', 'c', 'd', 'e', 'g', 'h', 'i', 'j', 'k', 'l', 'm', 'n', 'o', 'p', 'r', 's', 't', 'u', 'v', 'y', 'Ê', 'Ù', 'Ý', 'è', 'ñ', 'ā', 'ī', 'ś', 'ū', '̐', 'क़', 'ग़', 'ज़', 'ड़', 'फ़', 'ḍ', 'ḥ', 'ḷ', 'ṃ', 'ṅ', 'ṇ', 'ṛ', 'ṣ', 'ṭ']
On a closer look we see that there is still some Devanagari-characters in the set. I guess we need to investigate further. Any ideas?
And there is another thing missing in the picture: Retrieving random-samples from the corpus. This is the method for doing so:
def random_substring_of_length(string, length):
    """ Retrieves a random substring of a fixed length from a string. """

    start_index = random.randint(0, len(string) - length)
    return string[start_index:start_index + length]
And finally, we encode an arbitrary string to a sequence of encoded characters with respect to the character set. One-hot-encoding. A standard technique. This is our encoder:
def encode_string(string):
    """ Encodes a string in order to use it in the Neural Network context. """

    encoded_string = []
    for character in string:
        encoded_character = np.zeros((len(character_set),))
        one_hot_index = character_set.index(character)
        encoded_character[one_hot_index] = 1.0
        encoded_string.append(encoded_character)
    return np.array(encoded_string)
Let us try this quickly with an example:
encoded = encode_string("ab")
print(encoded)
This will yield:
[[0. 0. 0. 0. 0. 0. 1. 0. 0. 0. 0. 0. 0. 0. 0. 0. 0. 0. 0. 0. 0. 0. 0. 0.
  0. 0. 0. 0. 0. 0. 0. 0. 0. 0. 0. 0. 0. 0. 0. 0. 0. 0. 0. 0. 0. 0. 0. 0.
  0. 0. 0.]
 [0. 0. 0. 0. 0. 0. 0. 1. 0. 0. 0. 0. 0. 0. 0. 0. 0. 0. 0. 0. 0. 0. 0. 0.
  0. 0. 0. 0. 0. 0. 0. 0. 0. 0. 0. 0. 0. 0. 0. 0. 0. 0. 0. 0. 0. 0. 0. 0.
  0. 0. 0.]]
One-hot-encodings in their raw beauty! Lots of zeros and only one one! Think about „information density“! But this is another topic.
The data-set is in place. Let us train!
Wow! That was a joyride! It was quite easy to retrieve the data-set in its proper encoding. This one-hot-encoding can be used for Neural Network training. All the values are small. And Neural Networks like small values… Now we can create the model:
def create_model():
    """ Creates the model. """

    input_shape = (input_length, len(character_set))

    model = models.Sequential()
    model.add(layers.LSTM(hidden_size, input_shape=input_shape, activation="relu"))
    model.add(layers.Dense(output_length * len(character_set), activation="relu"))
    model.add(layers.Reshape((output_length, len(character_set))))
    model.add(layers.TimeDistributed(layers.Dense(len(character_set), activation="softmax")))
    model.summary()

    model.compile(
        loss='categorical_crossentropy',
        optimizer='adam',
        metrics=['accuracy'])

    return model
In its essence, the Neural Network is a sequence-to-sequence model. It takes a sequence of input characters and predicts a sequence of output characters. There is absolutely no magic here. The LSTM-layer provides some short-term-memory. This is basically what LSTMs do. Usually the training-time increases along with the accuracy.
And before we forget… There is also a helper function that plots the training-history as PNG files. You do this in all Deep Learning projects:
def plot_history(history):
    """ Plots the history. """

    # Render the accuracy.
    plt.plot(history.history['acc'])
    plt.title('model accuracy')
    plt.ylabel('accuracy')
    plt.xlabel('epoch')
    plt.legend(['train', 'test'], loc='upper left')
    plt.savefig("accuracy.png")
    plt.clf()

    # Render the loss.
    plt.plot(history.history['loss'])
    plt.title('model loss')
    plt.ylabel('loss')
    plt.xlabel('epoch')
    plt.legend(['train', 'test'], loc='upper left')
    plt.savefig("loss.png")
Yeah! This was the whole data preprocessing and Neural Network training part! And to be honest… This is almost no code. I like to stress that in 2018 Deep Learning can be done quickly and with little code.
After a couple of epochs generate some text. First learn, then predict.
The main method has a very interesting line with a callback. I did not mention it at all. Now it is time. Since I am a good guy, you do not have to scroll. Here it is:
generate_callback = callbacks.LambdaCallback(on_epoch_end=on_epoch_end)
This is a lambda-callback. A callback that calls an arbitrary method. On the end of every epoch this method is invoked:
def on_epoch_end(epoch, logs):
    """ This callback is invoked at the end of each epoch. """

    # Do some magic every ten epochs, but not in the first one.
    if epoch % 10 == 0 and epoch != 0:
        print("")

        # Try different epochs.
        for temperature in [0.0, 0.25, 0.5, 0.75, 1.0]:
            print("Temperature:", temperature)
            global full_text
            random_string = random_substring_of_length(full_text, input_length)
            result_string = random_string
            print("Seed string:  ", random_string)
            input_sequence = encode_string(random_string)

            # Generate a string.
            while len(result_string) < generation_length:
                output_sequence = model.predict(np.expand_dims(input_sequence, axis=0))
                output_sequence = output_sequence[0]
                decoded_string = decode_sequence(output_sequence, temperature)
                output_sequence = encode_string(decoded_string)
                result_string += decoded_string
                input_sequence = input_sequence[output_length:]
                input_sequence = np.concatenate((input_sequence, output_sequence), axis=0)

            print("Result string:", result_string, len(result_string))
What does it do? Every ten epochs a couple of random strings are generated by the Neural Network. But not in the first epoch! This would be stupid. The code generates a long sequence of characters from a random sample. That random sample is extracted from the corpus. Decoding is easy. For each element in the sequence, decode it with respect to the character-set:
def decode_sequence(sequence, temperature=0.0):
    """ Decodes a predicted sequence into a string. Uses temperature. """

    result_string = ""
    for element in sequence:
        index = get_index_from_prediction(element)
        character = character_set[index]
        result_string += character
    return result_string
But wait… Characters are encoded as one-hot-vectors. And the network predicts a vector of probabilities. Again vectors of floats. How to decode those predictions? A nice and important piece of the puzzle is missing. Getting the index of the predicted character:
def get_index_from_prediction(prediction, temperature=0.0):
    """ Gets an index from a prediction. """

    # Zero temperature - use the argmax.
    if temperature == 0.0:
        return np.argmax(prediction)

    # Non-zero temperature - do some random magic.
    else:
        prediction = np.asarray(prediction).astype('float64')
        prediction = np.log(prediction) / temperature
        exp_prediction= np.exp(prediction)
        prediction = exp_prediction / np.sum(exp_prediction)
        probabilities = np.random.multinomial(1, prediction, 1)
        return np.argmax(probabilities)
Basically it is getting the index of the maximum element in the sequence. Also, it makes use of a temperature. If the temperature is not zero a certain random element is applied in order to retrieve the character-index. This allows for adding a little more randomness during generation.
That it is! The Neural Network generates Hindi texts!
Et voila! Training works like a charm! And the text generation as well. Here are some examples of generated texts:
- bimukha yaha anucita nāhīṃ kāla bibasa sunāī tresaka bāūdhum̐ saba soī nāga dekhi kṛtra mani asu āe tava mṛśīṣa manahmata samujhāvaṃta trasanihi rāgī gura gira
- e kitane dinoṃ taka āśrama meṃ rahanā paḍā lekita lāyā calakara unakī chūm̐ ke sītda bahuta vahī . bhagasa rahe vaha kṛpāla bhagata jasam̐ bāhina bibeka binadhi
- hārī soi maya dānavam̐ bahuri sam̐vārā kahaṃiha sabahi sudāsi hitum̐ upāyām̐ hūm̐ saba sukha suṃda bidhāka bidhākā binara dhanī bhāmi basa kālasavata bhayaum̐ t
- balakala bimala dukūla nātha sātha surabari bhālā bacana suhana bṛdayam̐ rasa bhae mana birāmmu samānā hadi brīṣā prīti do r apa mānī ti upa śrī dāsa mṛdara mi
- mahum̐ jāta sarāhata puni puni pavanakum̐ bhāli bibala saba chiyaÝ “ pṛśrdyīaiūś ṇśrśṭa taba jadama kuta khaga kala karo ke jāta apane vaṭana ko usa liye ‚ū g
Unfortunately I cannot read it 🙂
On a side-note: Google’s Colaboratory for Deep Learning and art.
You know, I am a honest guy. Recently I kinda grew to like Google’s Colaboratory. This is Jupyter notebooks as GoogleDocs with GPU-acceleration. This sounds as good as it really is! Give it a try. Copy paste the source-code into a new notebook and run it. It works like a charm. You can even download files like this:
def browser_download():
    """ Download files in the browser. """

    from google.colab import files

    files.download("accuracy.png")
    files.download("loss.png")
    files.download("model.h5")
Nice, isn’t it? A little bummer: I guess now you allow Google to have a look at your source-codes! So consider using it twice.
Summary.
What a blast! You have seen so many things… How to download a Hindi corpus. How to clean and transliterate it. How to encode the outcome for Neural Network training. And how to create a Seq2Seq model. I hope you had as much reading the tutorial as I had writing it! And oh… By the way. You will find the full source-code in my GitHub-repository. Thank you. Namaste!
Stay in touch.
I hope you liked the article. Why not stay in touch? You will find me at LinkedIn, XING and Facebook. Please add me if you like and feel free to like, comment and share my humble contributions to the world of AI. Thank you!
If you want to become a part of my mission of spreading Artificial Intelligence globally, feel free to become one of my Patrons. Become a Patron!
A quick about me. I am a computer scientist with a love for art, music and yoga. I am a Artificial Intelligence expert with a focus on Deep Learning. As a freelancer I offer training, mentoring and prototyping. If you are interested in working with me, let me know. My email-address is tristan@ai-guru.de - I am looking forward to talking to you!